Monday, September 1, 2014
Browse »
home»
book
»
digital
»
factory
»
initilize
»
mode
»
prs
»
reader
»
sony
»
t1
»
test
»
TEST MODE FACTORY INITILIZE SONY SONY DIGITAL BOOK READER PRS T1
.jpg)


TEST MODE FACTORY INITILIZE SONY SONY DIGITAL BOOK READER PRS T1
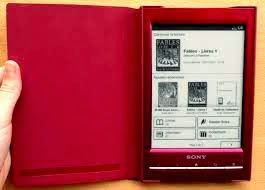
FACTORY INITILIZE – TEST MODE – SONY DIGITAL BOOK READER- PRS-T1
.jpg)
TEST MODE
PREPARATION OF THE TEST MODE
Prepare the following before executing the test mode.
* PC
* USB cable for PC connection (MICRO B)
* File for the test mode
Note: Confirm the method of obtaining the file for test mode to each service headquarters.
Procedure:
* Press the [Power] key to turn the power on.
* Confirm the HOME menu was completely displayed, and connect this unit to PC by the USB cable (MICRO B).
* Confirm the USB connection screen displayed, and touch the “Data Transfer Mode”.
* Confirm the “READER” drive of this unit is recognized.
* Copy the file for the test mode from PC to directly under the “READER” drive of this unit.
* Remove this unit and USB cable (MICRO B) from PC.
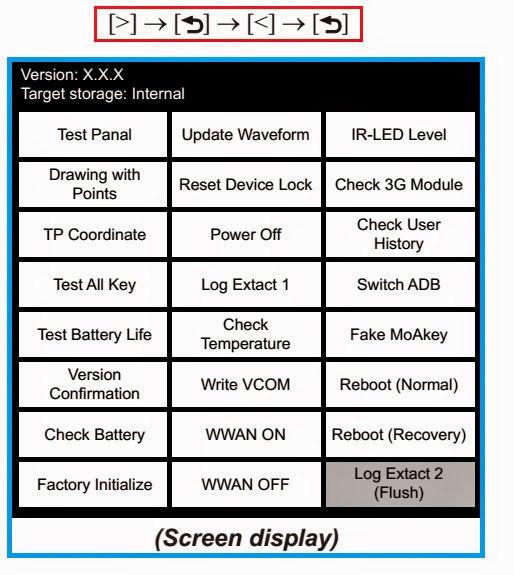
* Confirm the HOME menu was completely displayed, and press the key as following order.
After a while, the test mode menu is displayed, and this unit enters the test mode.

RELEASING THE TEST MODE
* Press the [Return] key, and confirm the HOME menu was completely displayed.
* Connect this unit to PC by the USB cable (MICRO B).
* Confirm the USB connection screen displayed, and touch the “Data Transfer Mode”.
* Confirm the “READER” drive of this unit is recognized.
* Delete the file for the test mode from directly under the “READER” drive of this unit.
* Remove this unit and USB cable (MICRO B) from PC.
* Confirm the HOME menu was completely displayed, and press the key as following order, and confirm that the test mode does not enter.
* Press the [Power] key for 5 seconds or more, and touch the “Yes” to turn the power off. [Never forget to delete the file for the test mode]
OPERATION OF EACH MODE
* Touch the “Test Panel” in the test mode menu.
* The image file is displayed (image files of in the directly as “/testmode/images/”). The format that can be treated is “.bmp”, “.jpeg” , “.gif” and “.png”. The all image files are transformed into the 600 x 800 size, and the linear interpolation processing of pixel is done.
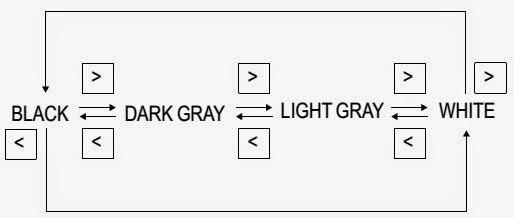
* Press the [<]/[>] keys, the image files are changed.
Note: If there are no image files, the screen changes into grayscale color. Press the [<]/[>] keys, the grayscale color changes sequentially as shown in the figure below.

Releasing method:
Press the [Return] key, return to the test mode menu.
Drawing with Points: This mode is not used in servicing.
TP Coordinate: This mode is not used in servicing.
Test All Key: This mode is not used in servicing.
Test Battery Life: This mode is not used in servicing.
Version confirmation: This mode is not used in servicing.
Check Battery: This mode is not used in servicing.
Factory Initialize
This unit can be returned to the state of the factory shipment.
Touch the “Factory Initialize” in the test mode menu.
When “Yes” is touched, the deletion of all histories and reset of all settings are executed, and then this unit turns the power off.
Subscribe to:
Post Comments (Atom)
No comments:
Post a Comment